MD Link uses the version control system Mercurial to track changes to solution and configuration files. MD Link comes bundled with TortoiseHg (a Mercurial graphical client program) by default as of MD Link version 6.6, and the "solutions" and "config" sub-folders of the data folder are managed under version control automatically upon installation.
You don't need to learn anything about version control in order to use MD Link. You can create your solution files and edit your configuration files on the hard disk in a straightforward way, as you did before the version control feature was added to MD Link. If you want to, then the version control feature offers a way for you to see past versions of your files. It does not add any additional steps unless you opt in. However if you invest some time into learning TortoiseHg, you will have more powerful options available to you.
- Run the MD Link Studio and create an empty solution file named "solution1.xcs".
- Go to MD Link's Start Menu > Tools - Version Control (TortoiseHg).
- You will see a screen appear similar to the one below.
- We are going to commit your new solution file. To "commit" is a version control term. It means: to create a backup of the files as they exist on the hard drive right now. To draw an analogy to a paper-based system: a "commit" is like making a photocopy of your source document and putting that photocopy into a drawer designated for backups.
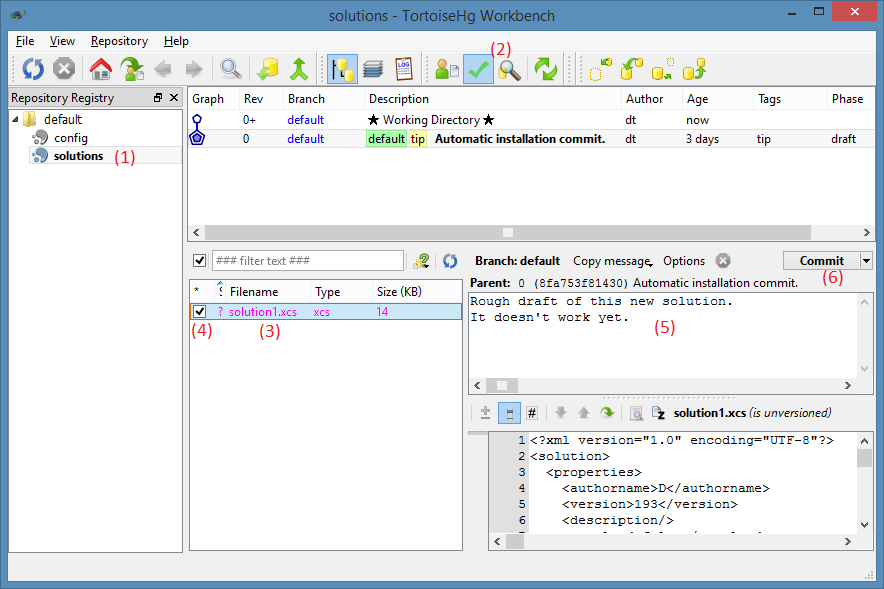
- Double-click on the "solutions" folder on the left (1). Click on the green checkbox (2). You will see your solution file listed (3). Select the checkbox at (4) to include this file in this commit. Type your "commit message" in the text area in (5). This is a note to your future self and your colleagues where you can explain the changes you made. Then click the Commit button (6).
- You will see your screen change to look like this:

A new row has appeared. This means that you have two revisions (or versions) now in your "solutions" repository: the initial revision (which is empty), and the revision you just committed (which contains solution1.xcs).
- Switch to the Studio and make a change to solution1.xcs. Edit the Description as shown:
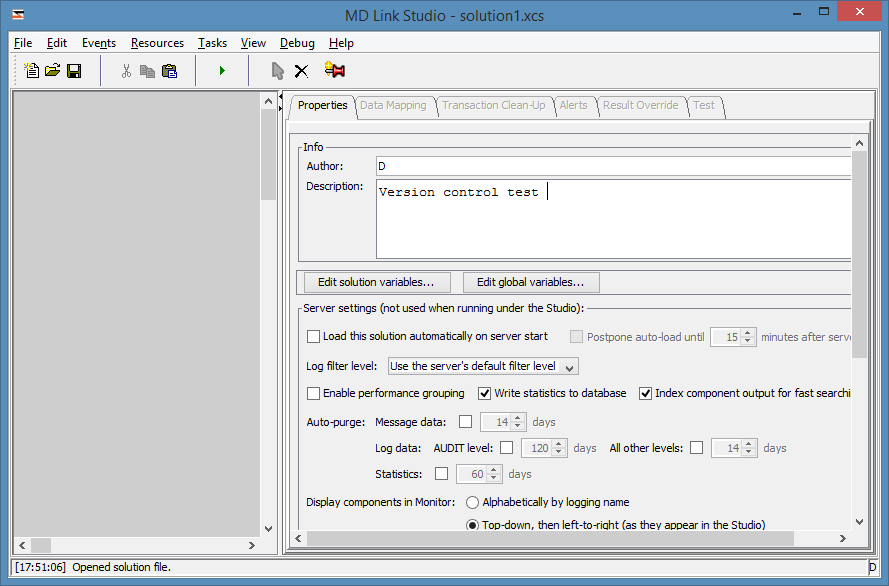
Then save the solution.
- Switch to TortoiseHg. Click on the green checkmark at the top of the window again:
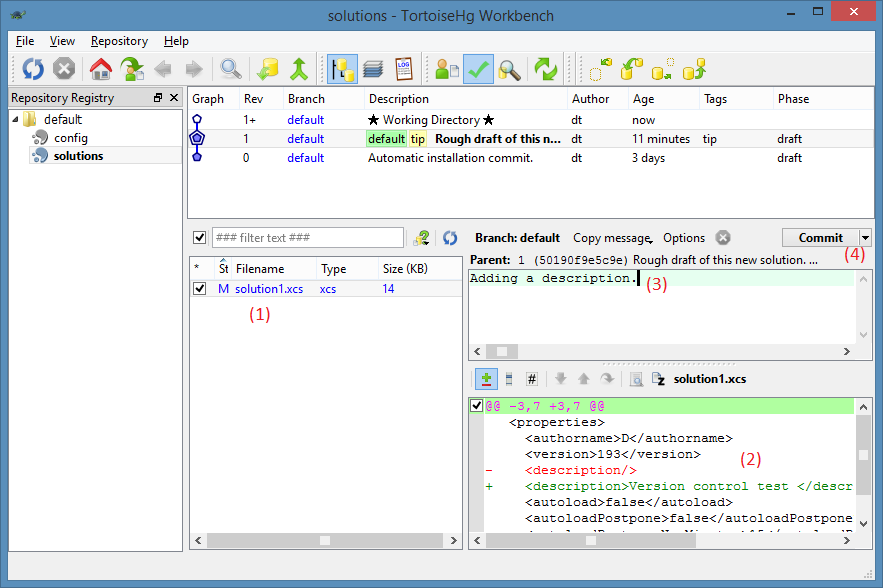
You will see solution1.xcs listed again (1). This indicates that TortoiseHg has noticed that this file has been changed. In the bottom right, you will see a view of the change you made to the .xcs file (2). If you double-click the filename at (1) you will see a full-screen view of these changes. Type another commit message (3) and click the Commit button (4).
- Now you have three revisions in version control, indicated by three rows:
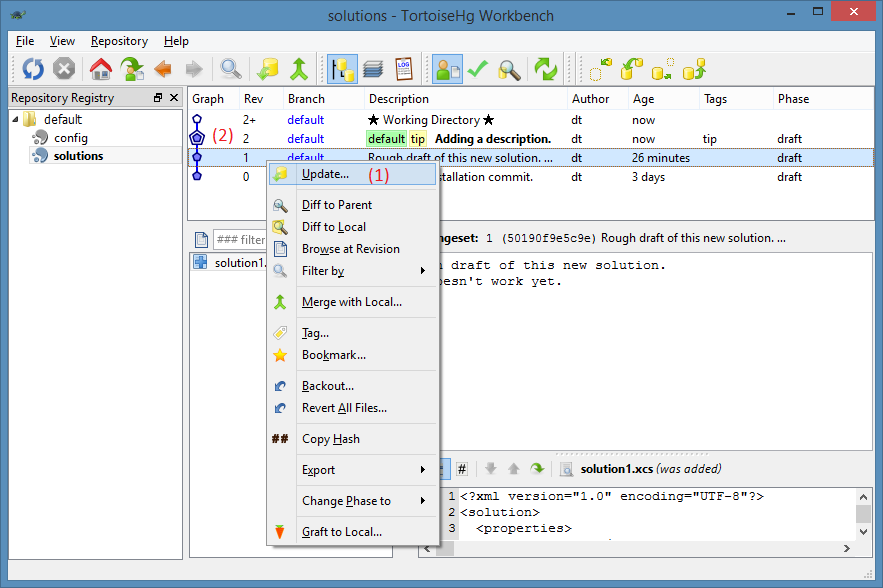
You can switch between them by right-clicking the corresponding row and choosing "Update" (1). Doing this will change the contents of solution1.xcs on the disk. The entire revision history is stored under a folder named ".hg". The current revision is indicated by a graphical border.
By default, MD Link will automatically commit all of the files in your "solutions" and "config" folders every 60 minutes, whenever the Studio or Service is running. To modify this behaviour, go to the MD Link data folder, then the "config" sub-folder, edit the files ServiceConfig.xml and/or StudioConfig.xml in a text editor, and look for the option named "automatic-commit-frequency-num-minutes".